
How to set up Msty Claw with Ozeki AI Gateway
This guide walks you through installing Msty Claw on Windows and connecting it to Ozeki AI Gateway as a custom model provider. By following this tutorial, you will learn how to download and install the Msty Claw desktop application, add Ozeki AI Gateway as a provider in the settings, and verify the connection by sending a test prompt.
What is Msty Claw?
Msty Claw is a desktop AI agent application developed by Msty AI. It is designed to run autonomous multi-step tasks on your local machine, with support for sandboxed folder access, tool use, and both local and cloud-based AI models. Because Msty Claw supports OpenAI-compatible API endpoints, it can be connected to Ozeki AI Gateway, letting you route all AI requests through your own gateway and take advantage of any model configured there.
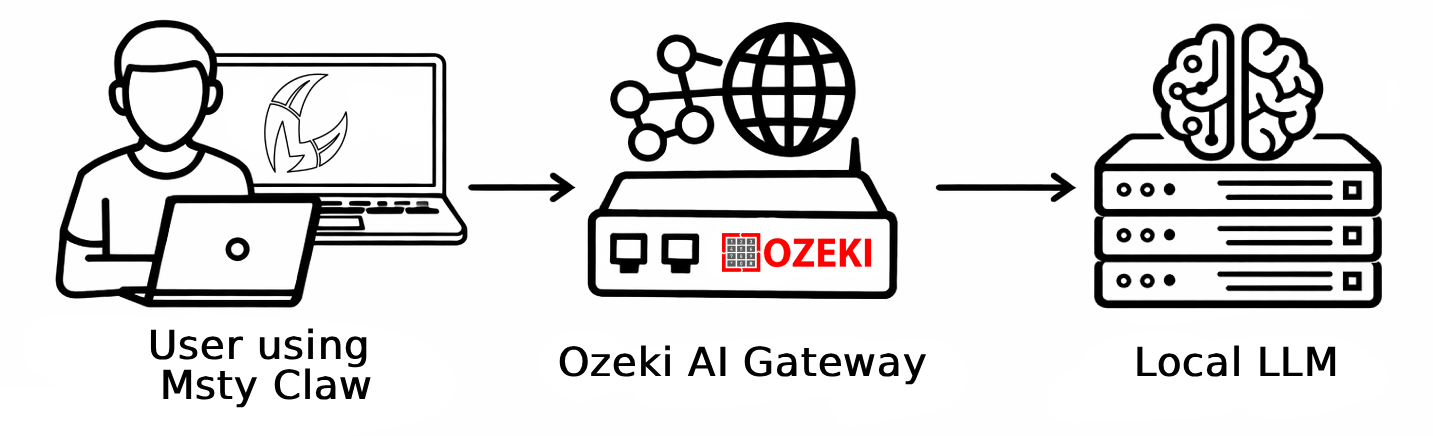
Msty Claw provider configuration
Provider name: Ozeki AI Gateway
API base URL:  http://localhost/v1
API key:       ozkey-abc123
Steps to follow
We assume Ozeki AI Gateway is already installed on your system. You can install it on Linux, Windows or Mac.
- Download and install Msty Claw
- Launch Msty Claw and start setup
- Add Ozeki AI Gateway as a provider
- Select a model and test the agent
Video tutorial
The following video shows how to install Msty Claw and configure it to work with Ozeki AI Gateway step-by-step.
Step 1 - Download and install Msty Claw
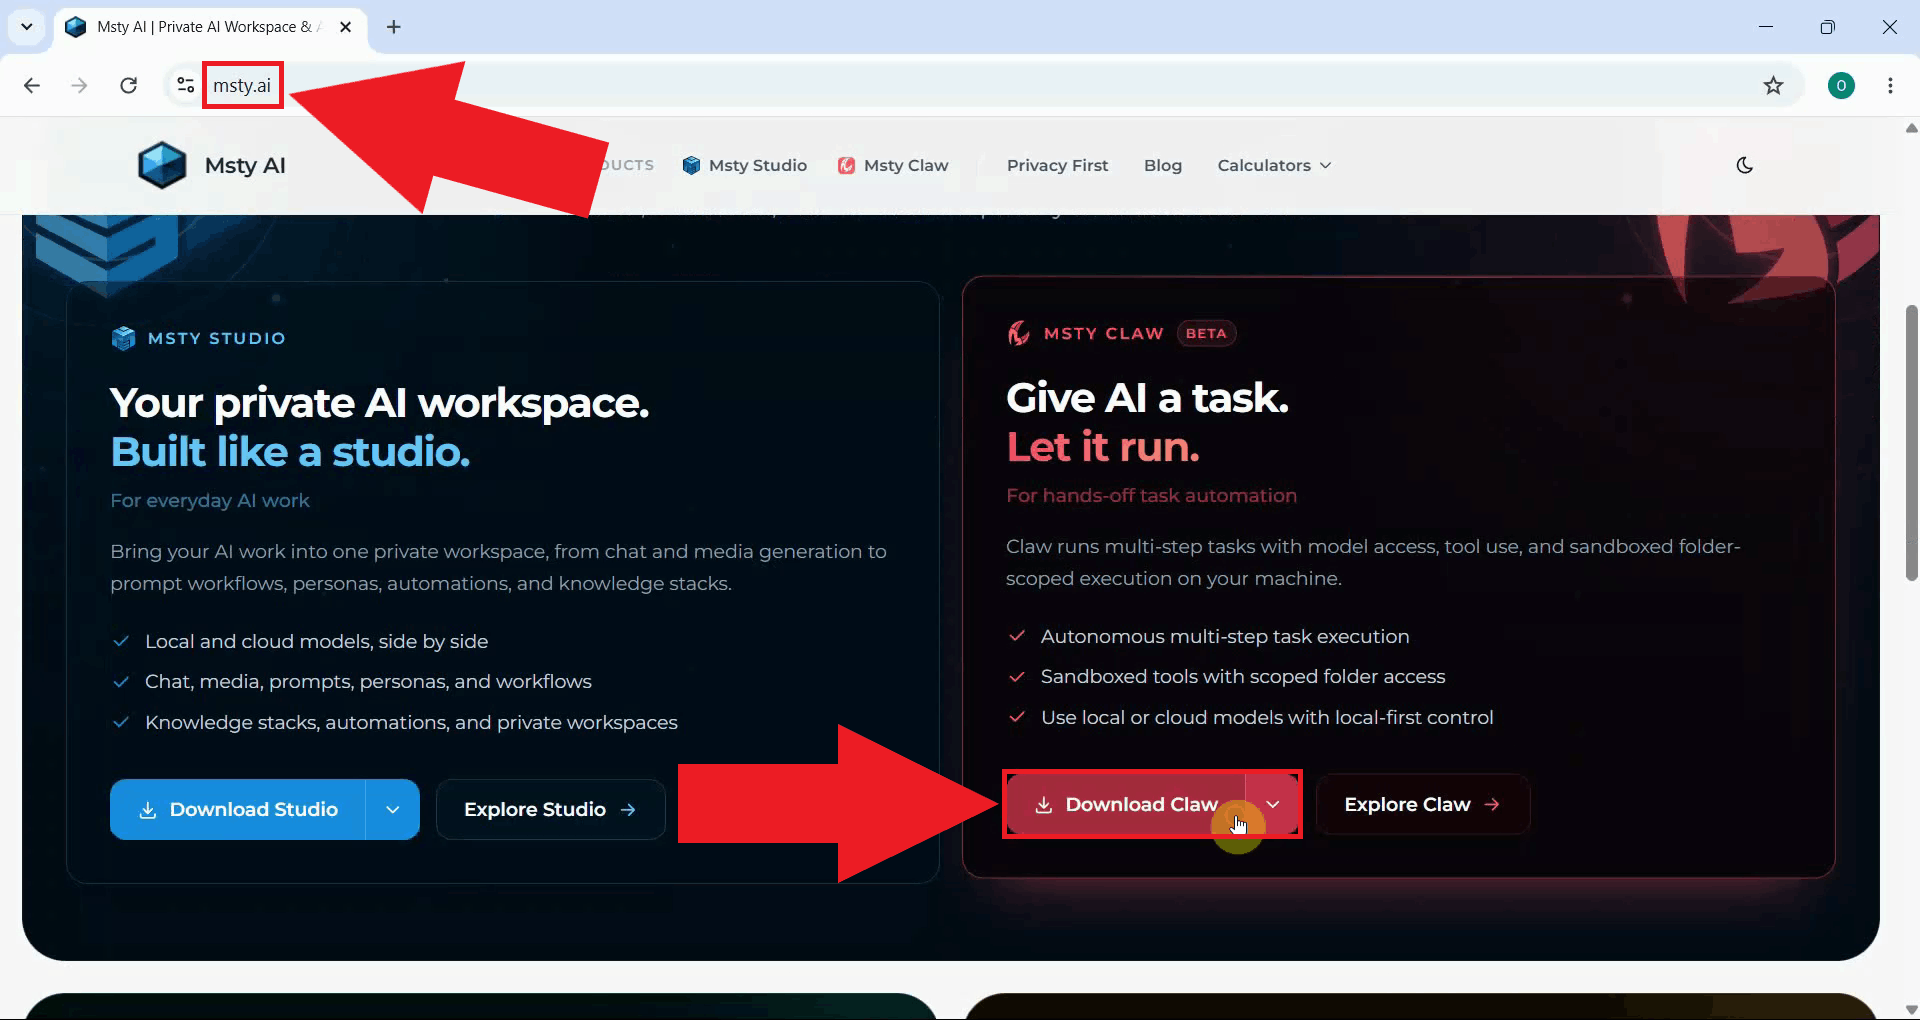
Open your browser and navigate to msty.ai. On the homepage, locate and click the Download Claw button to download the Windows installer (Figure 1).
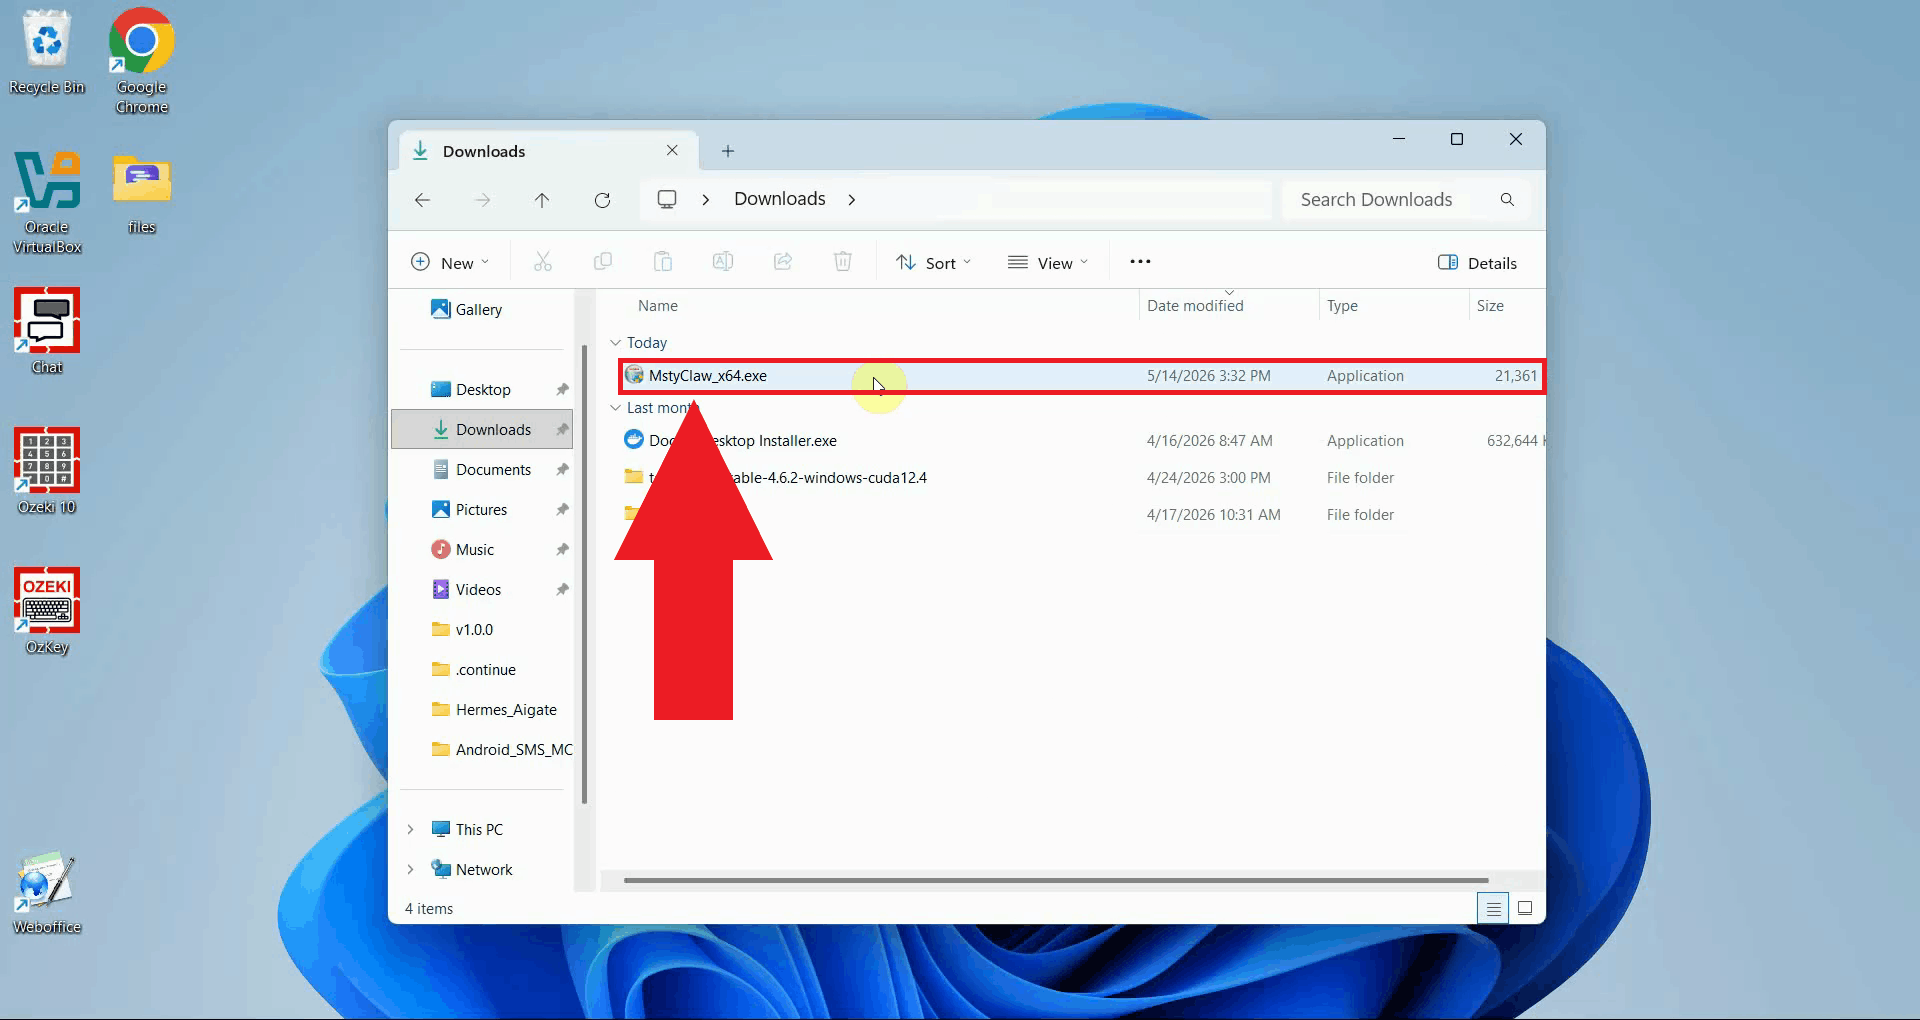
Once the download has finished, locate the installer file in your Downloads folder and double-click it to start the installation (Figure 2).
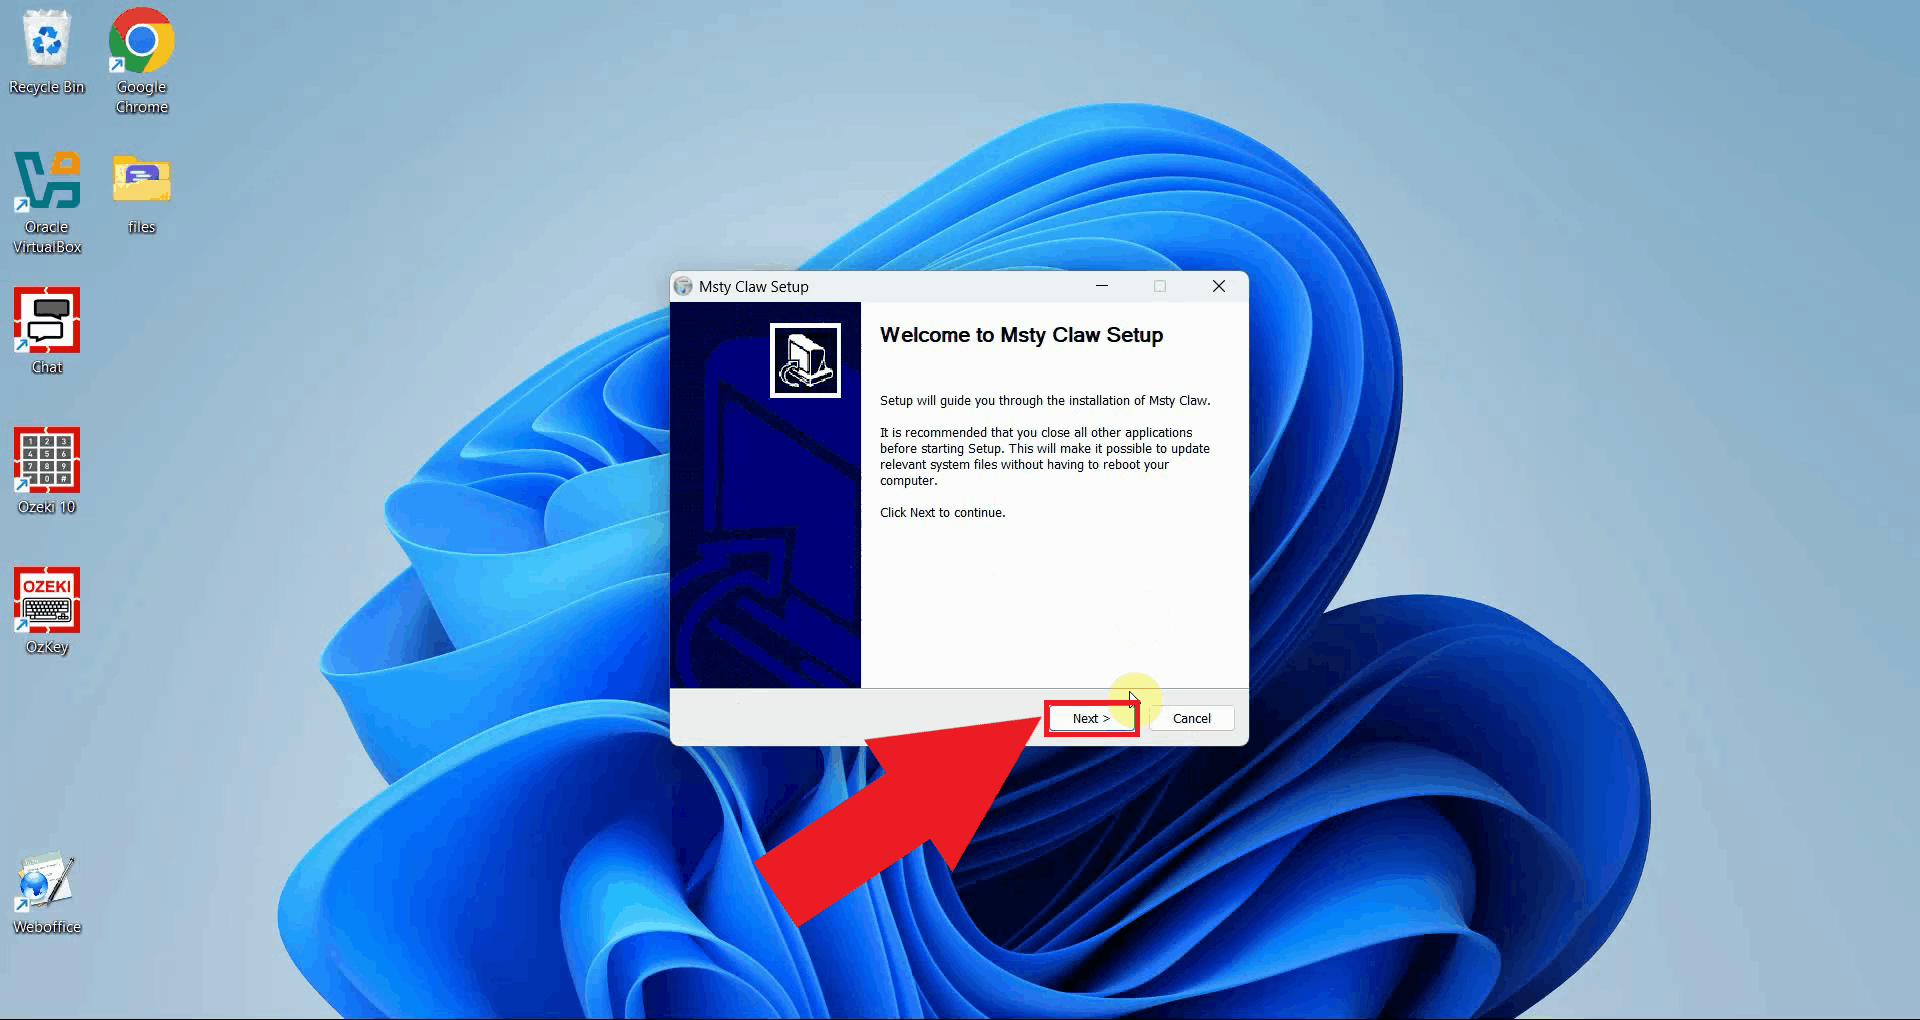
The setup wizard will open with a welcome screen that introduces the installation process. Click Next to proceed to the installation options (Figure 3).
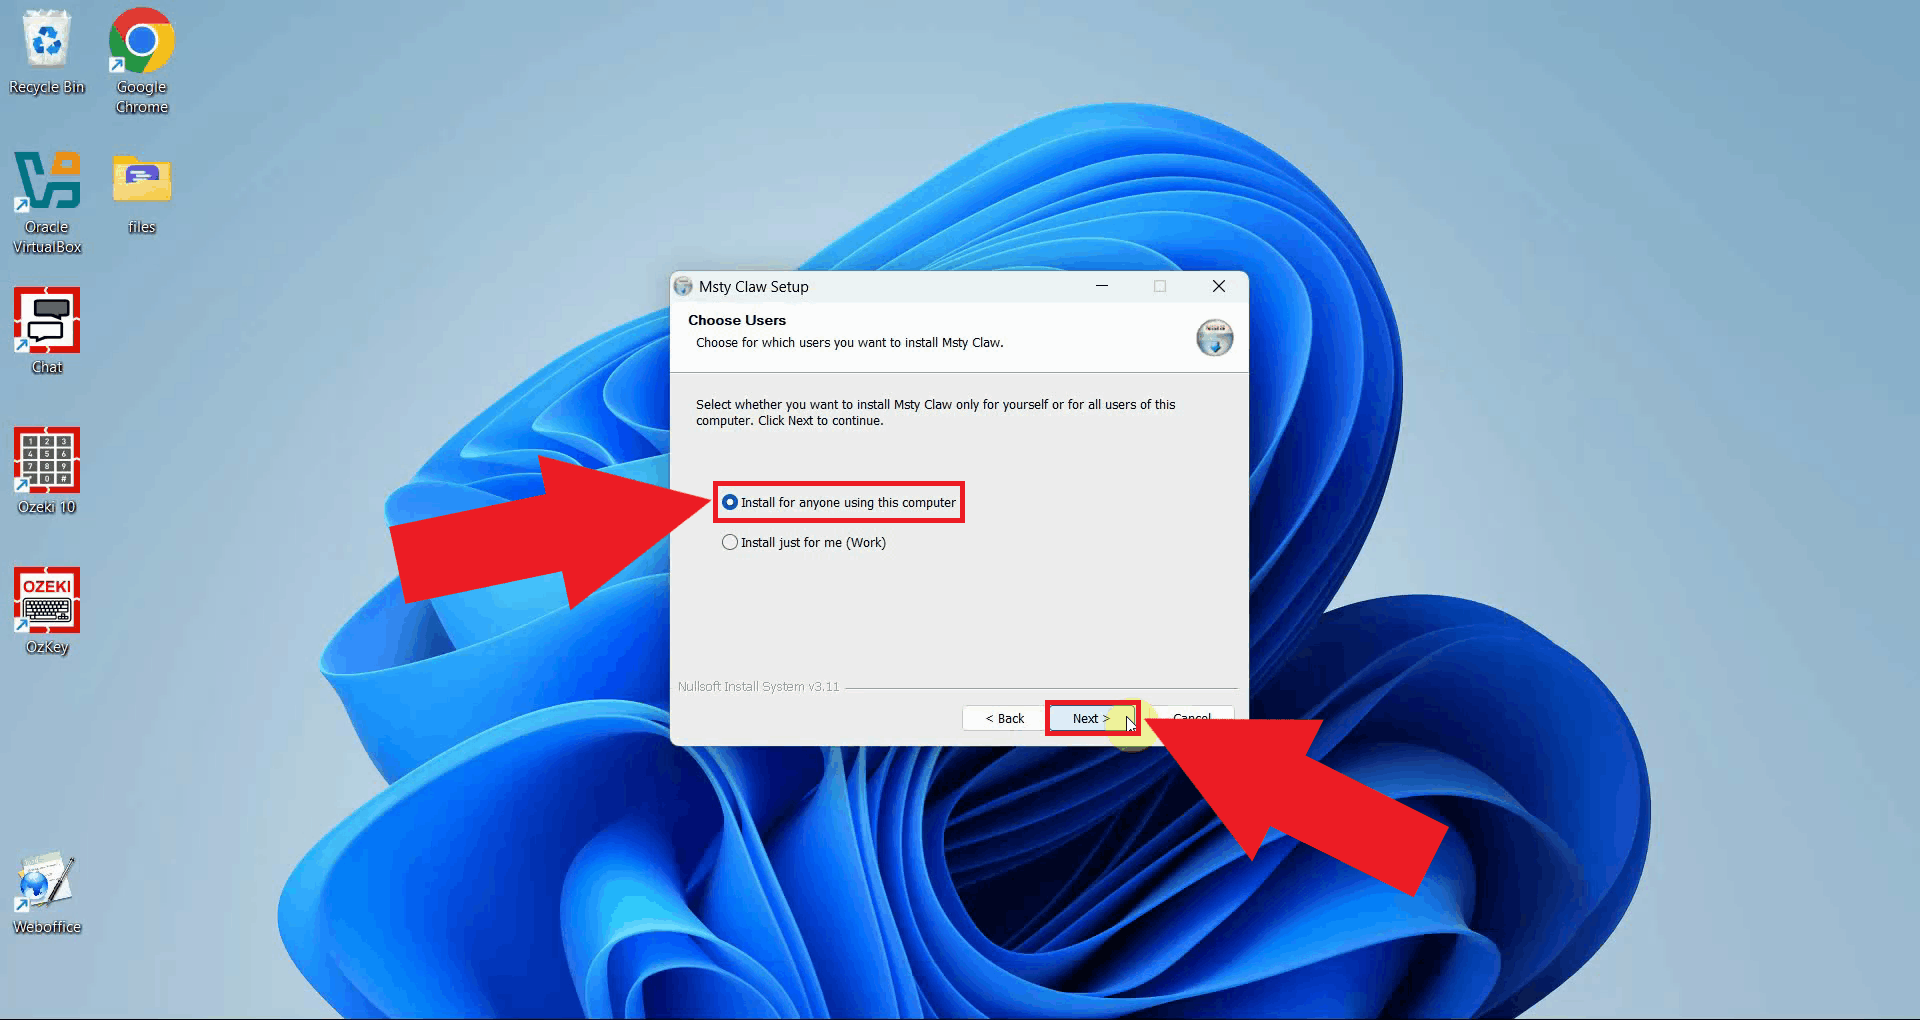
Choose whether to install Msty Claw for all users on the machine or only for your current account (Figure 4).
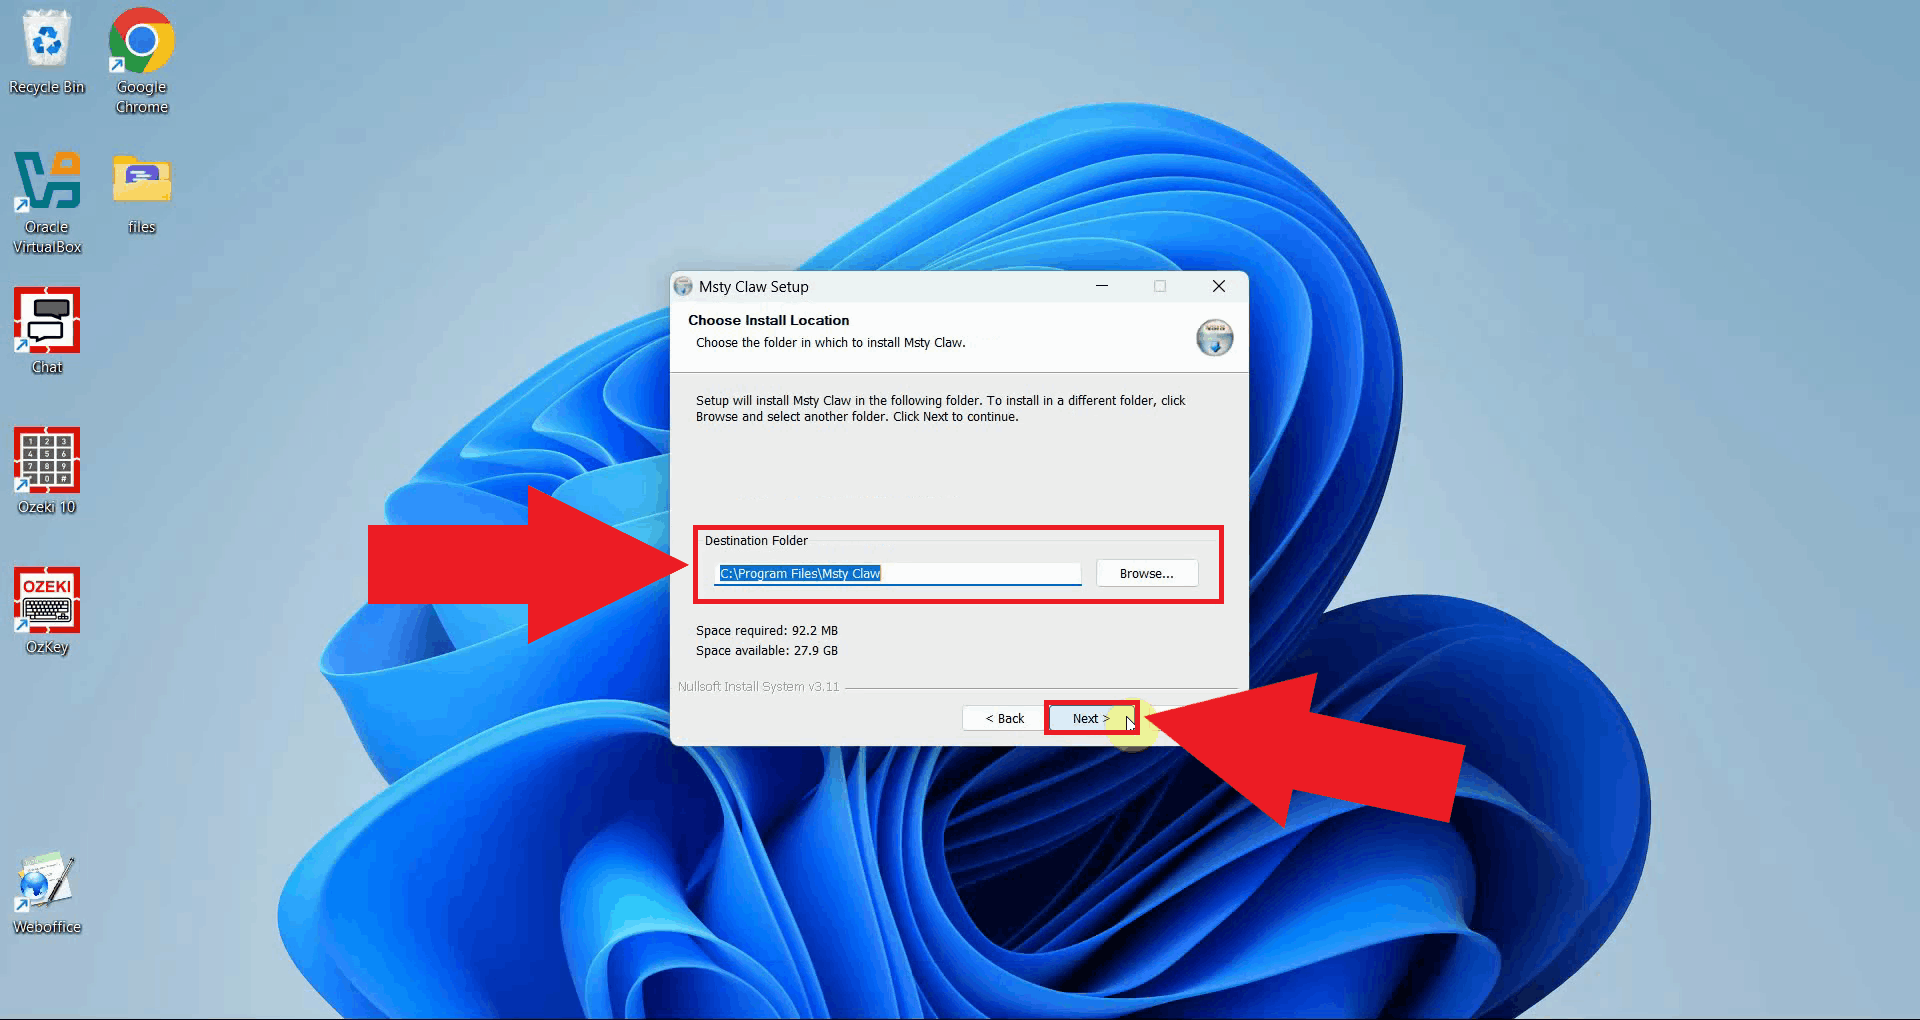
Confirm or change the destination folder where Msty Claw will be installed (Figure 5). The default location is recommended for most users. Click Next to begin copying the application files to your machine.
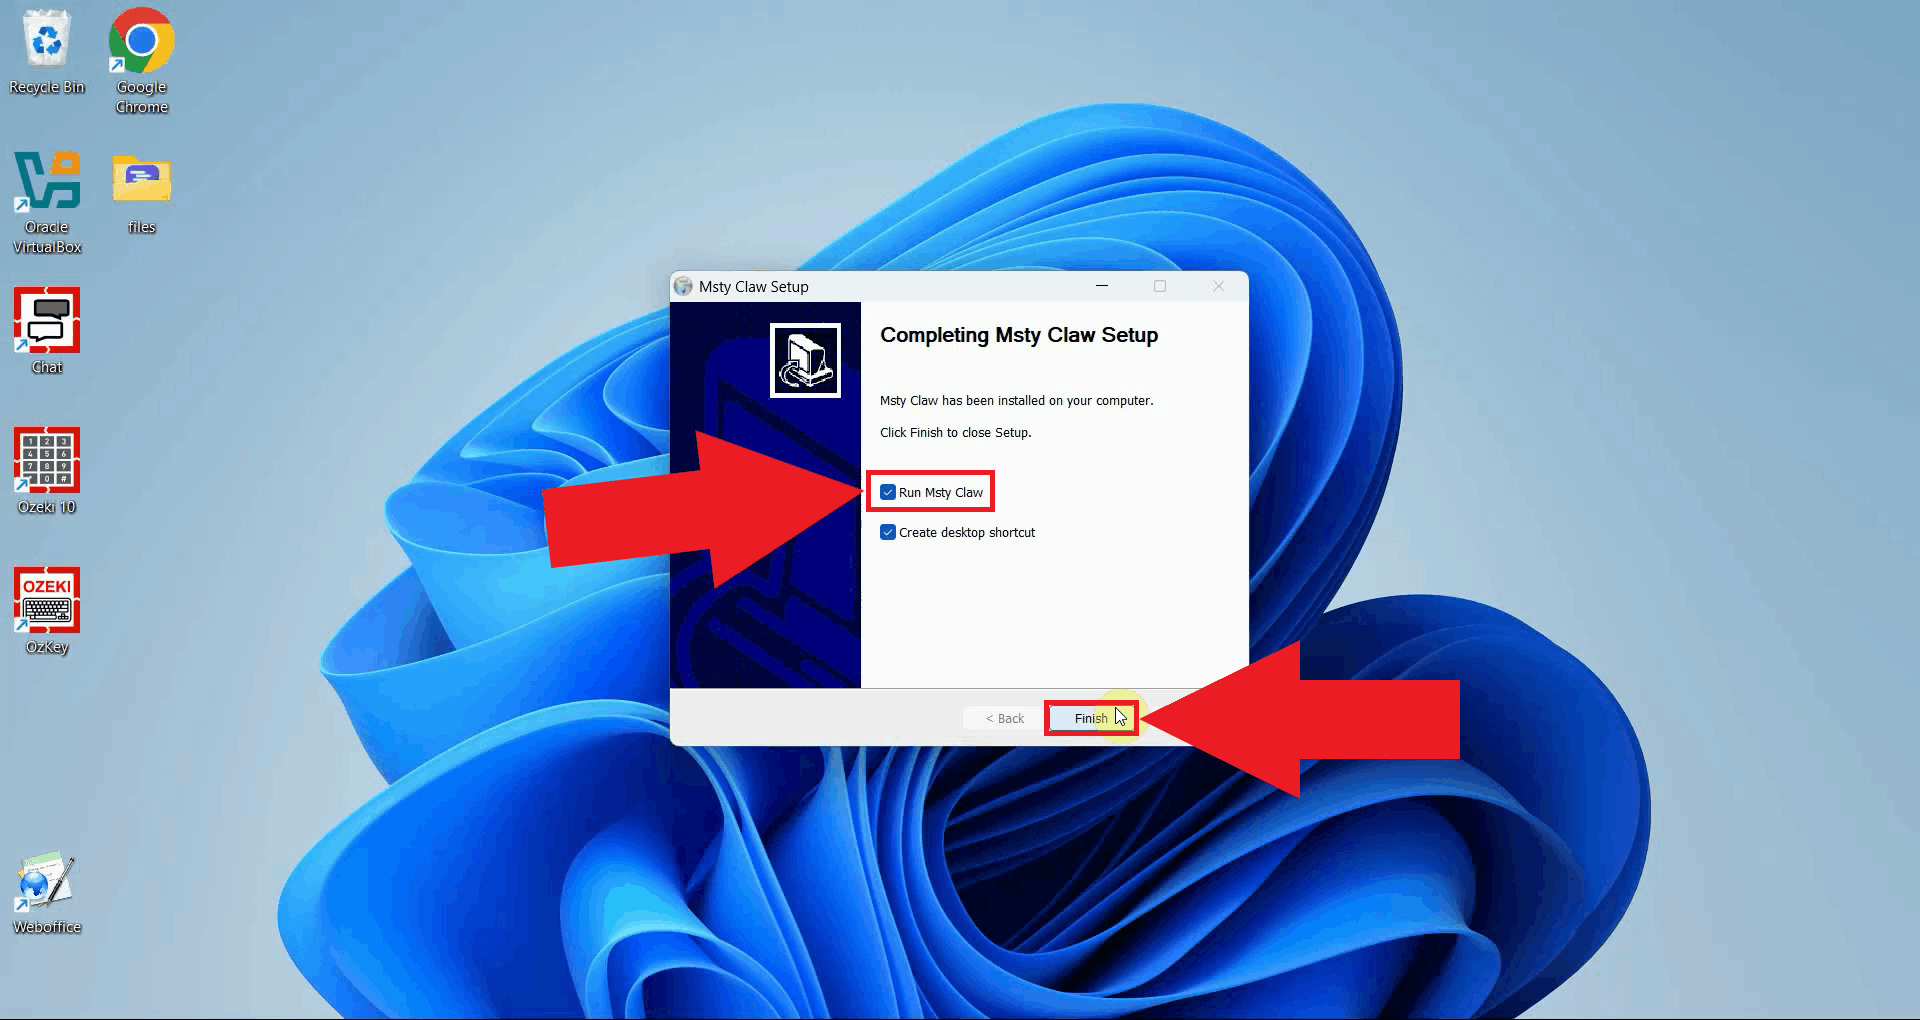
When the installation is complete, the wizard will show a confirmation screen. Click Finish to close the setup wizard and launch Msty Claw (Figure 6). The application will open automatically.
Step 2 - Launch Msty Claw and start setup
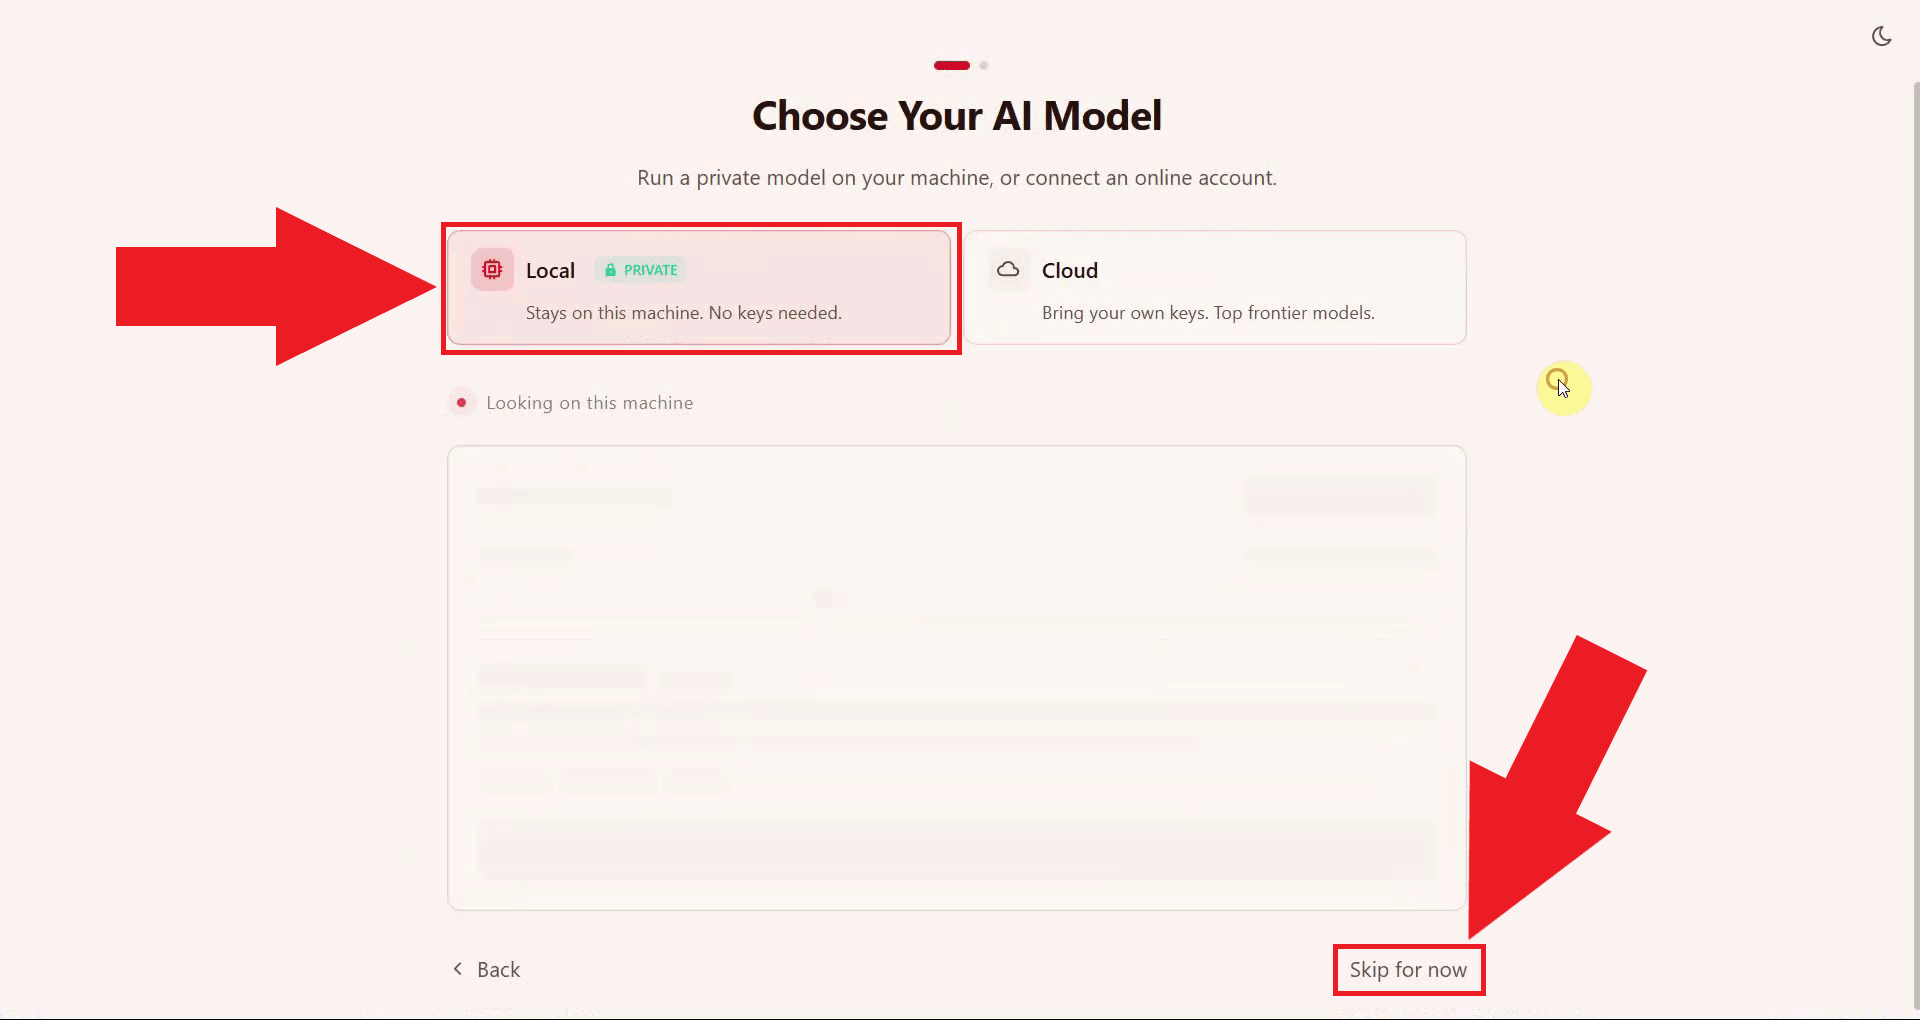
On the first launch, Msty Claw will display an onboarding screen asking you to configure a local AI model. Make sure Local AI is selected, then click Skip for now to proceed without setting up a local inference engine (Figure 7). You will connect to Ozeki AI Gateway instead in the next step.
Step 3 - Add Ozeki AI Gateway as a provider
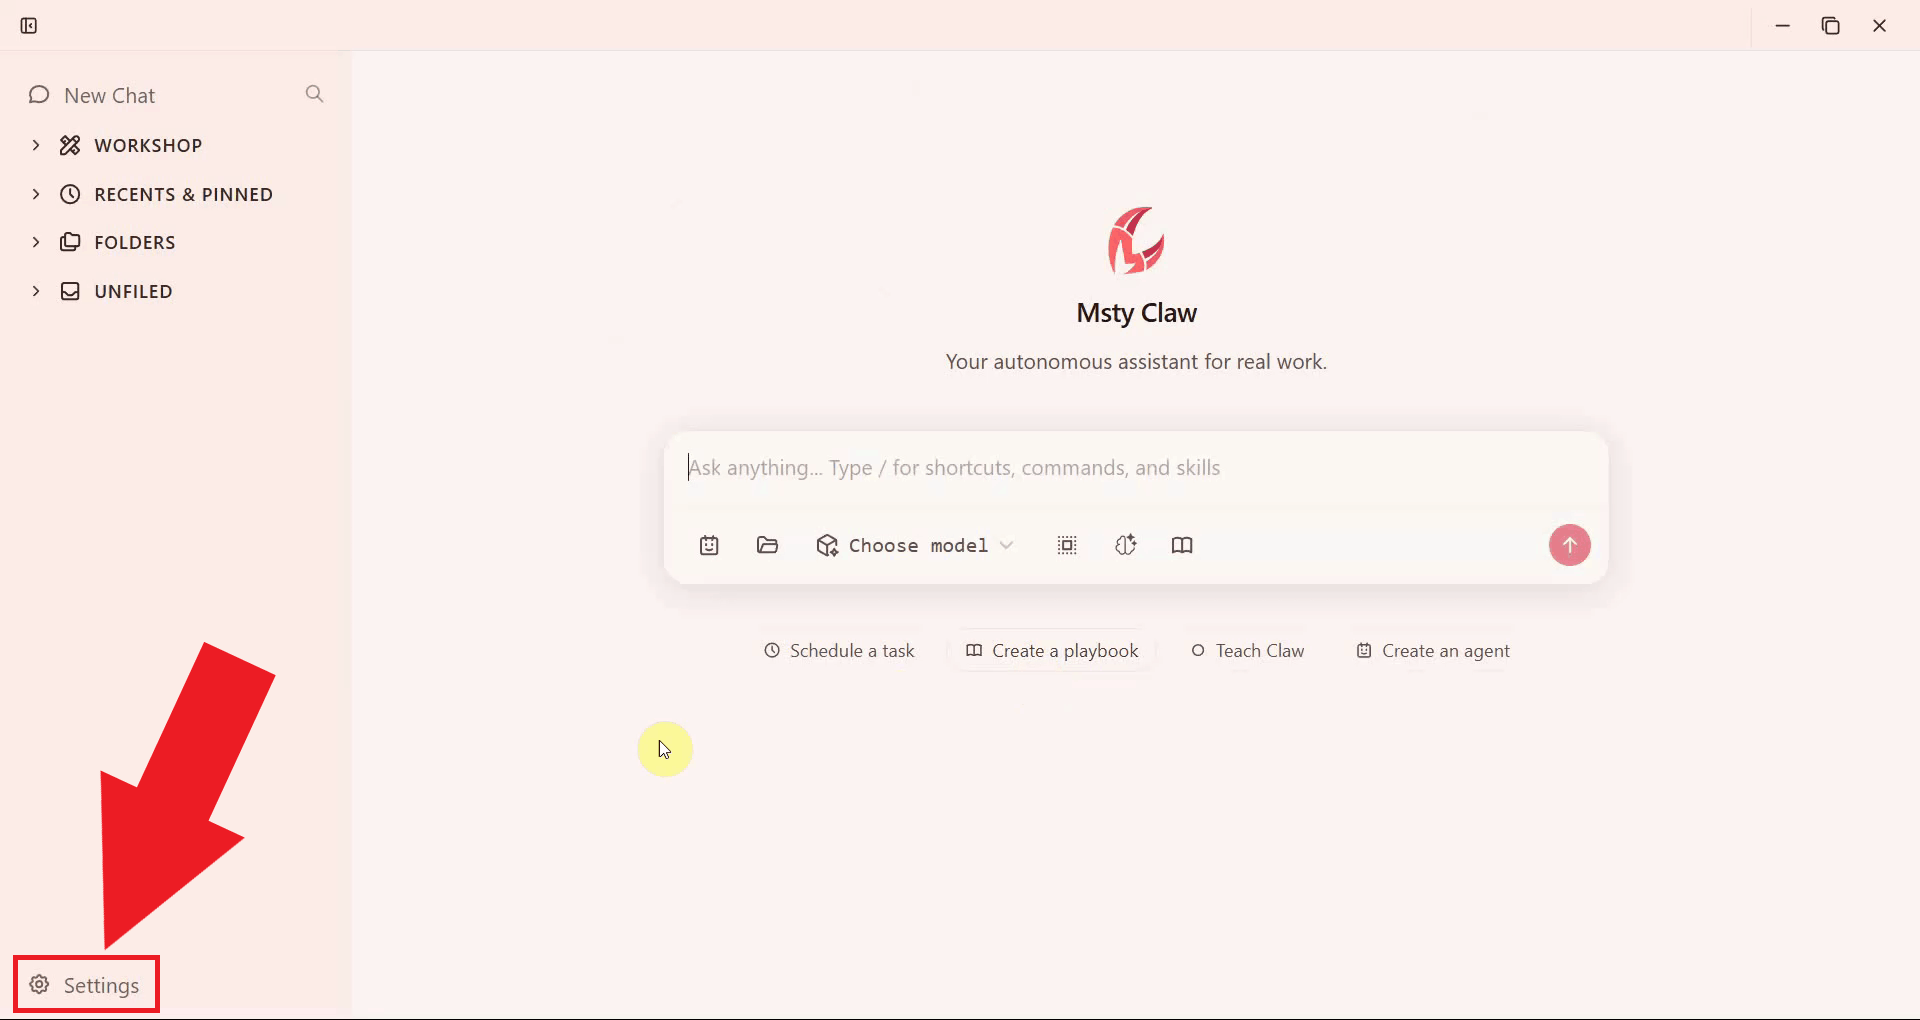
Once inside the application, open the settings by clicking the gear icon in the bottom left corner of the interface (Figure 8). This will take you to the Msty Claw settings panel, where you can manage model providers, tools, and other configuration options.
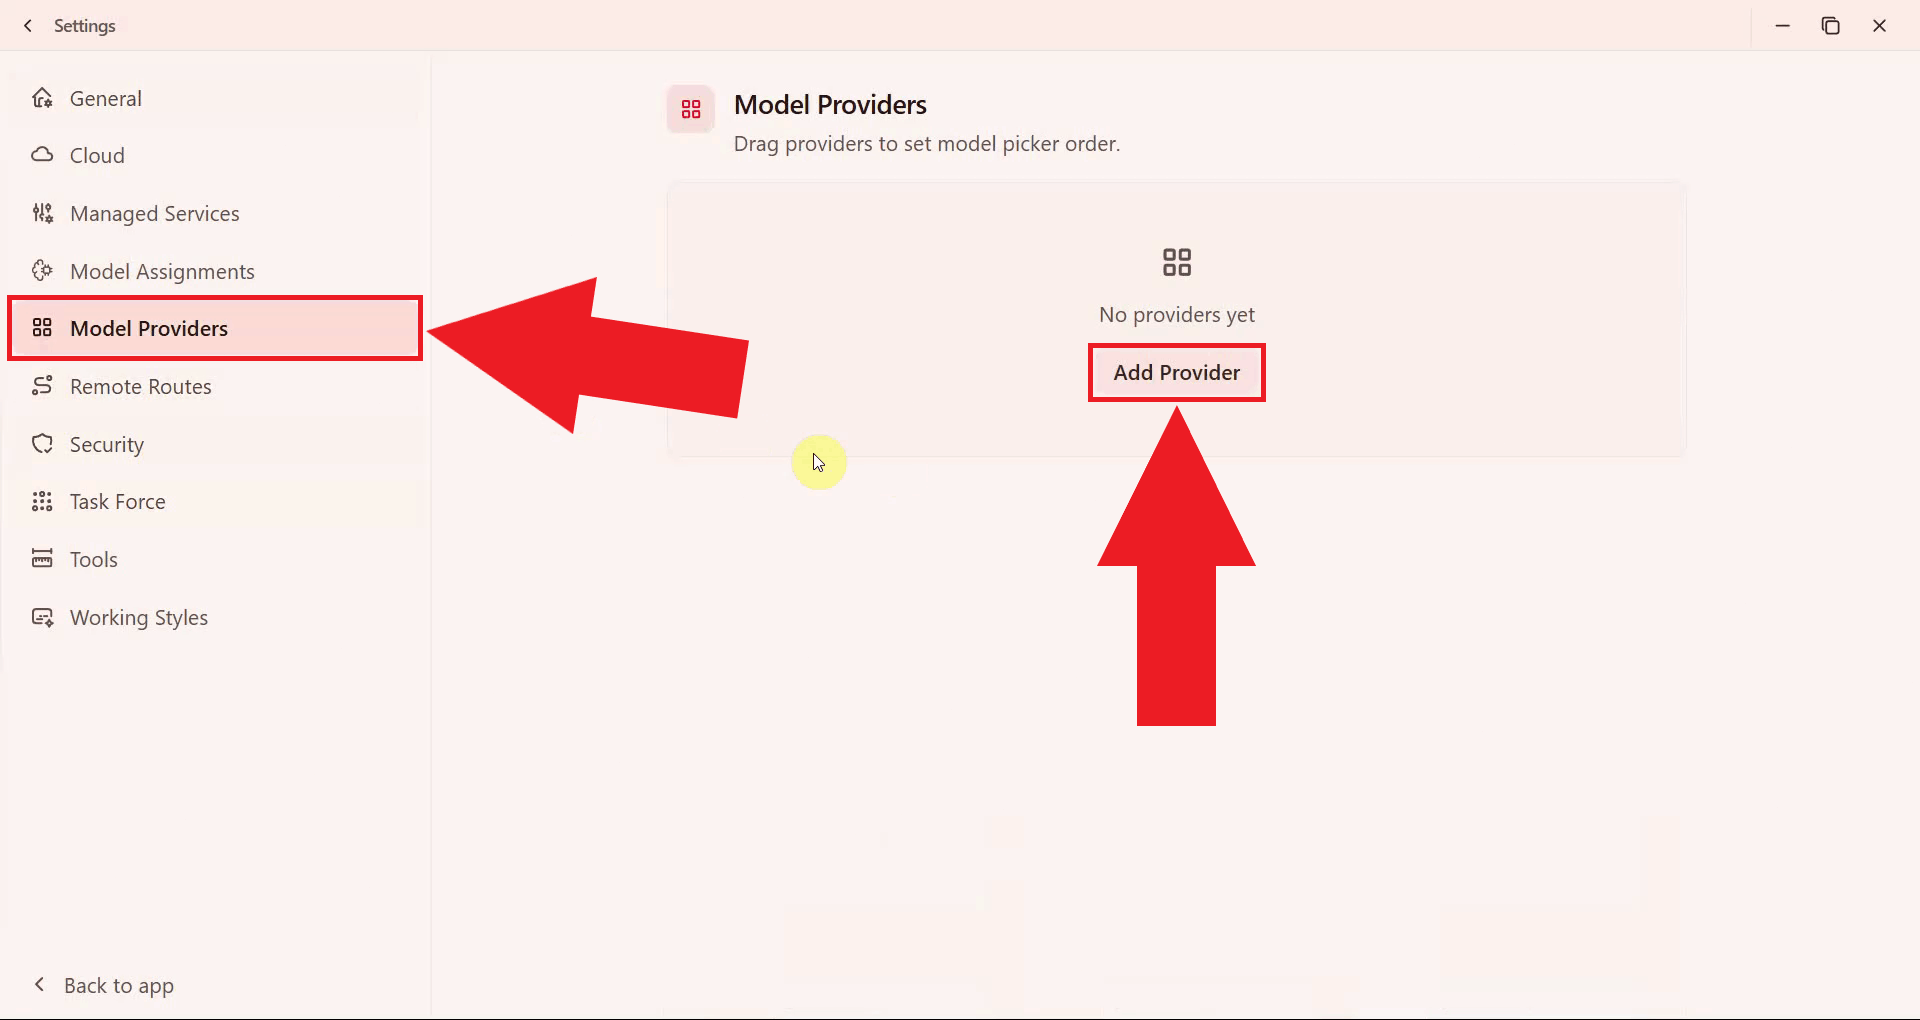
In the settings, select Model Providers from the sidebar and click Add Provider to open the provider configuration form (Figure 9).
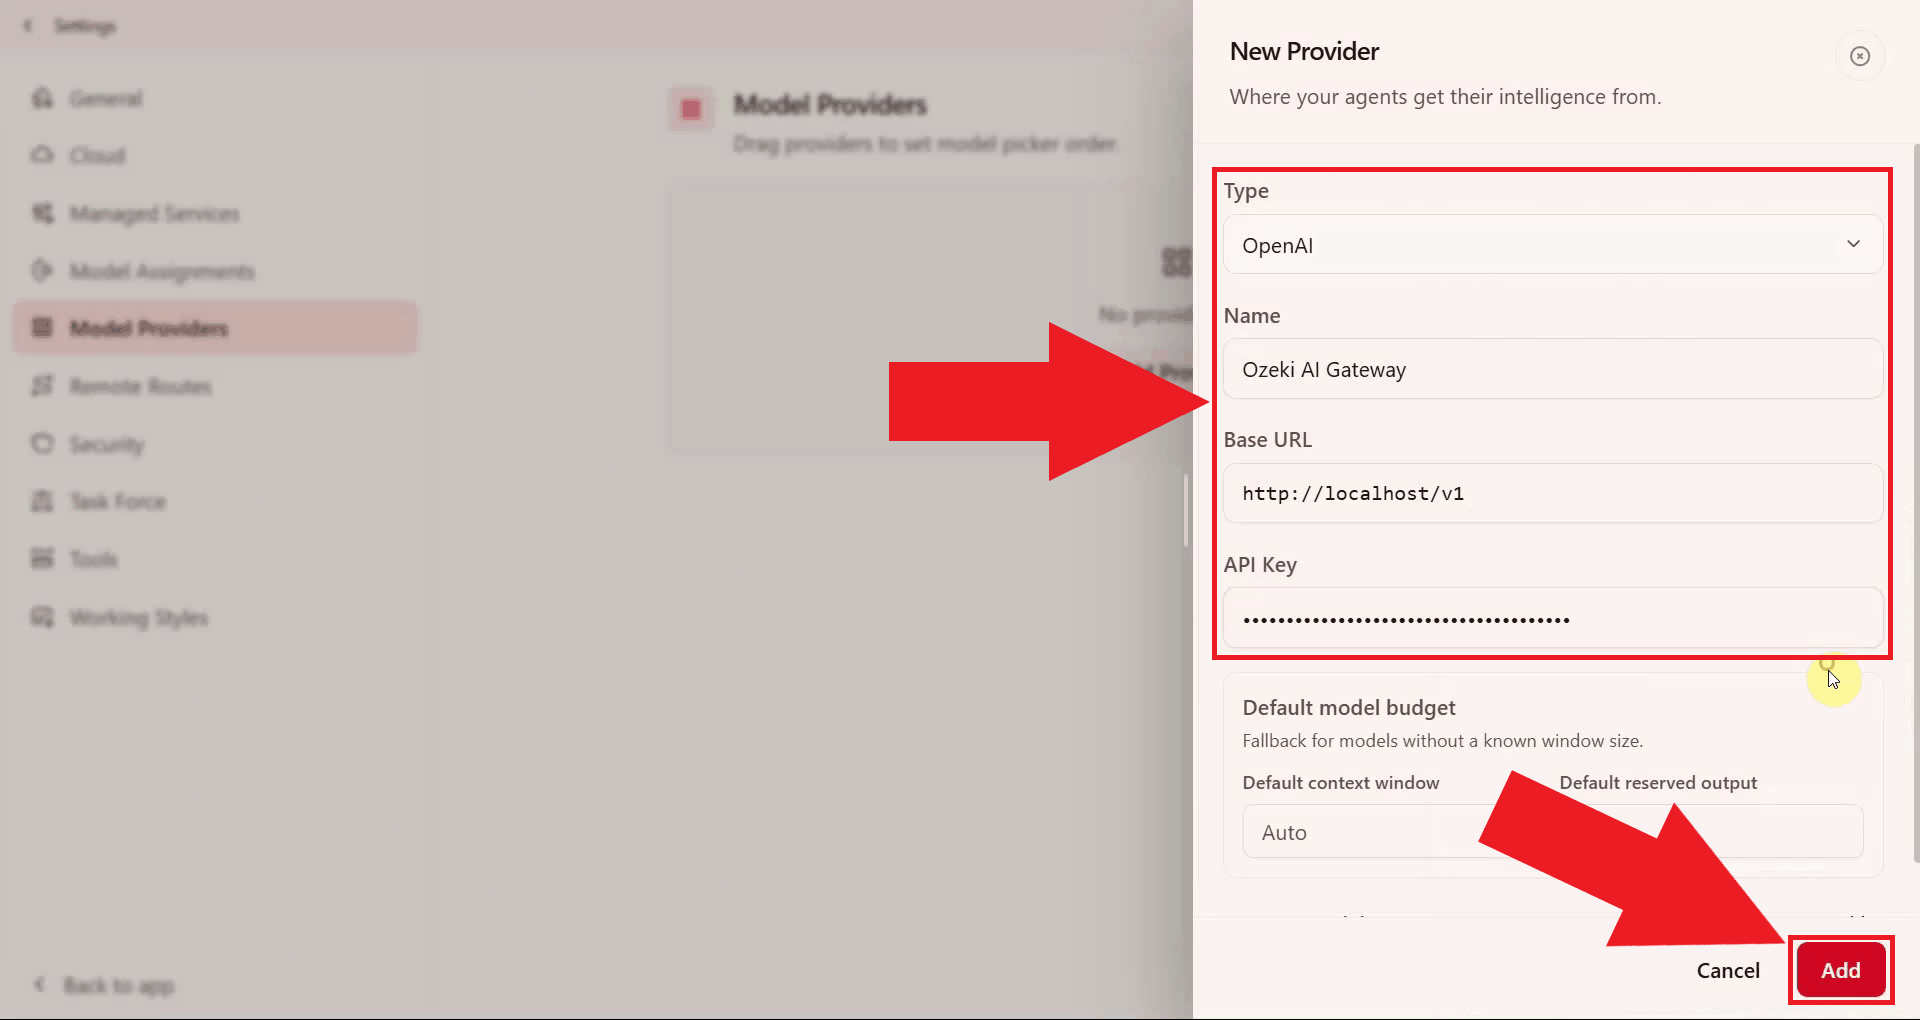
Fill in the provider details using the values below, making sure to set the connection
type to OpenAI. Replace ozkey-abc123 with the
API key you created in Ozeki AI Gateway, then click Add
to save the provider (Figure 10).
Provider name: Ozeki AI Gateway
API base URL:  http://localhost/v1
API key:       ozkey-abc123
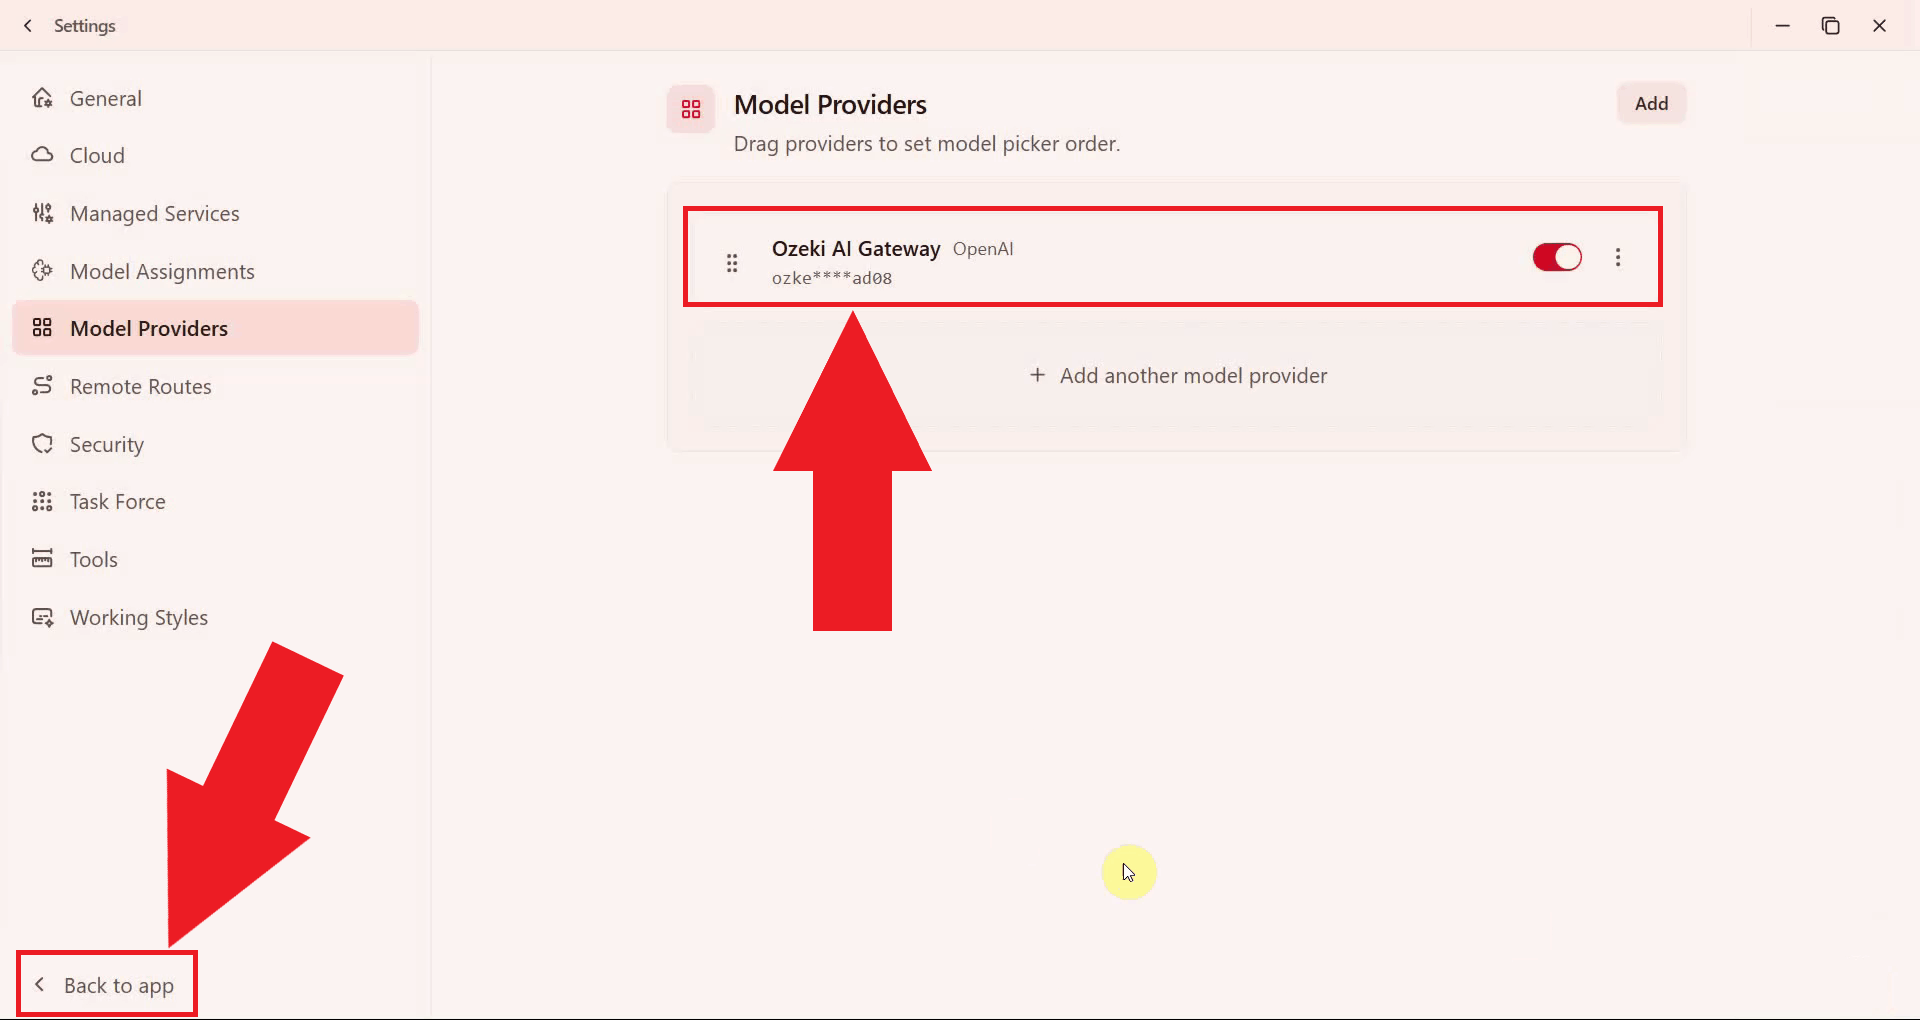
The new provider will appear in your provider list. Confirm the details are correct, then click the back button to return to the main chat interface (Figure 11).
Step 4 - Select a model and test the agent
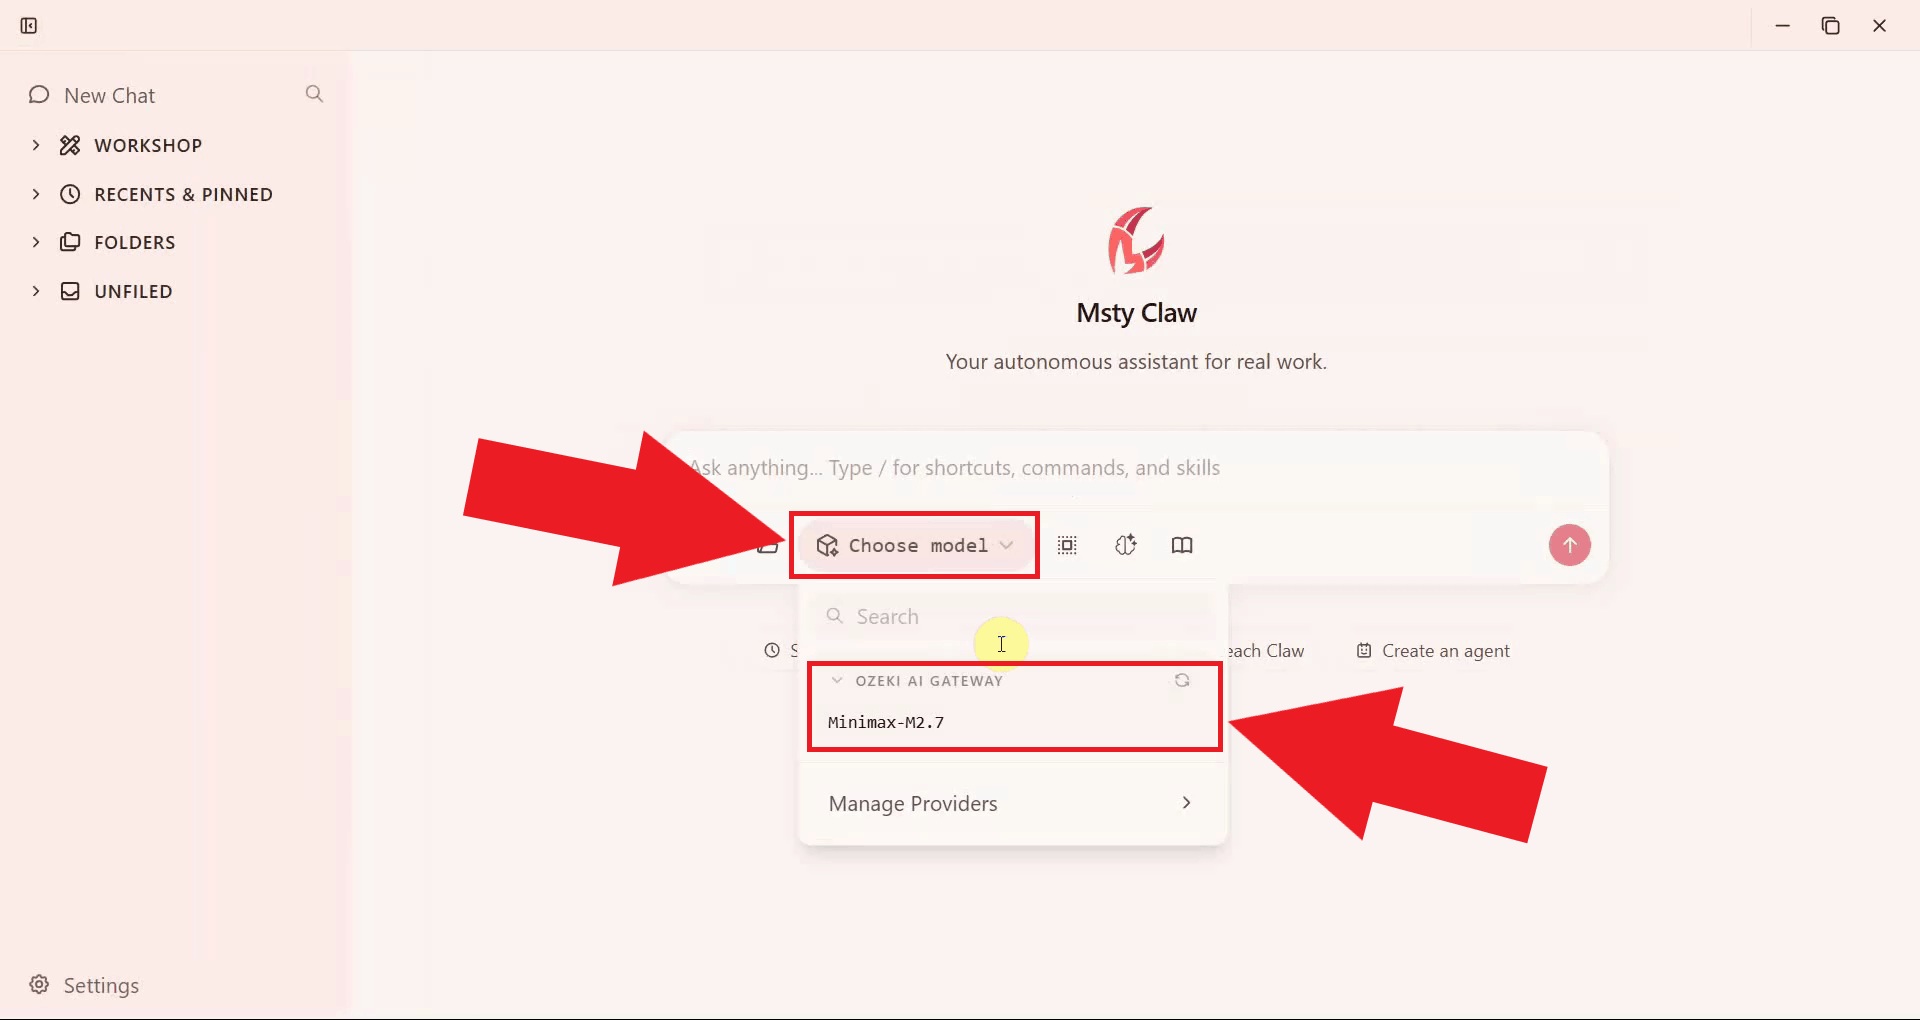
In the chat interface, open the model selector and choose one of the models available through Ozeki AI Gateway (Figure 12).
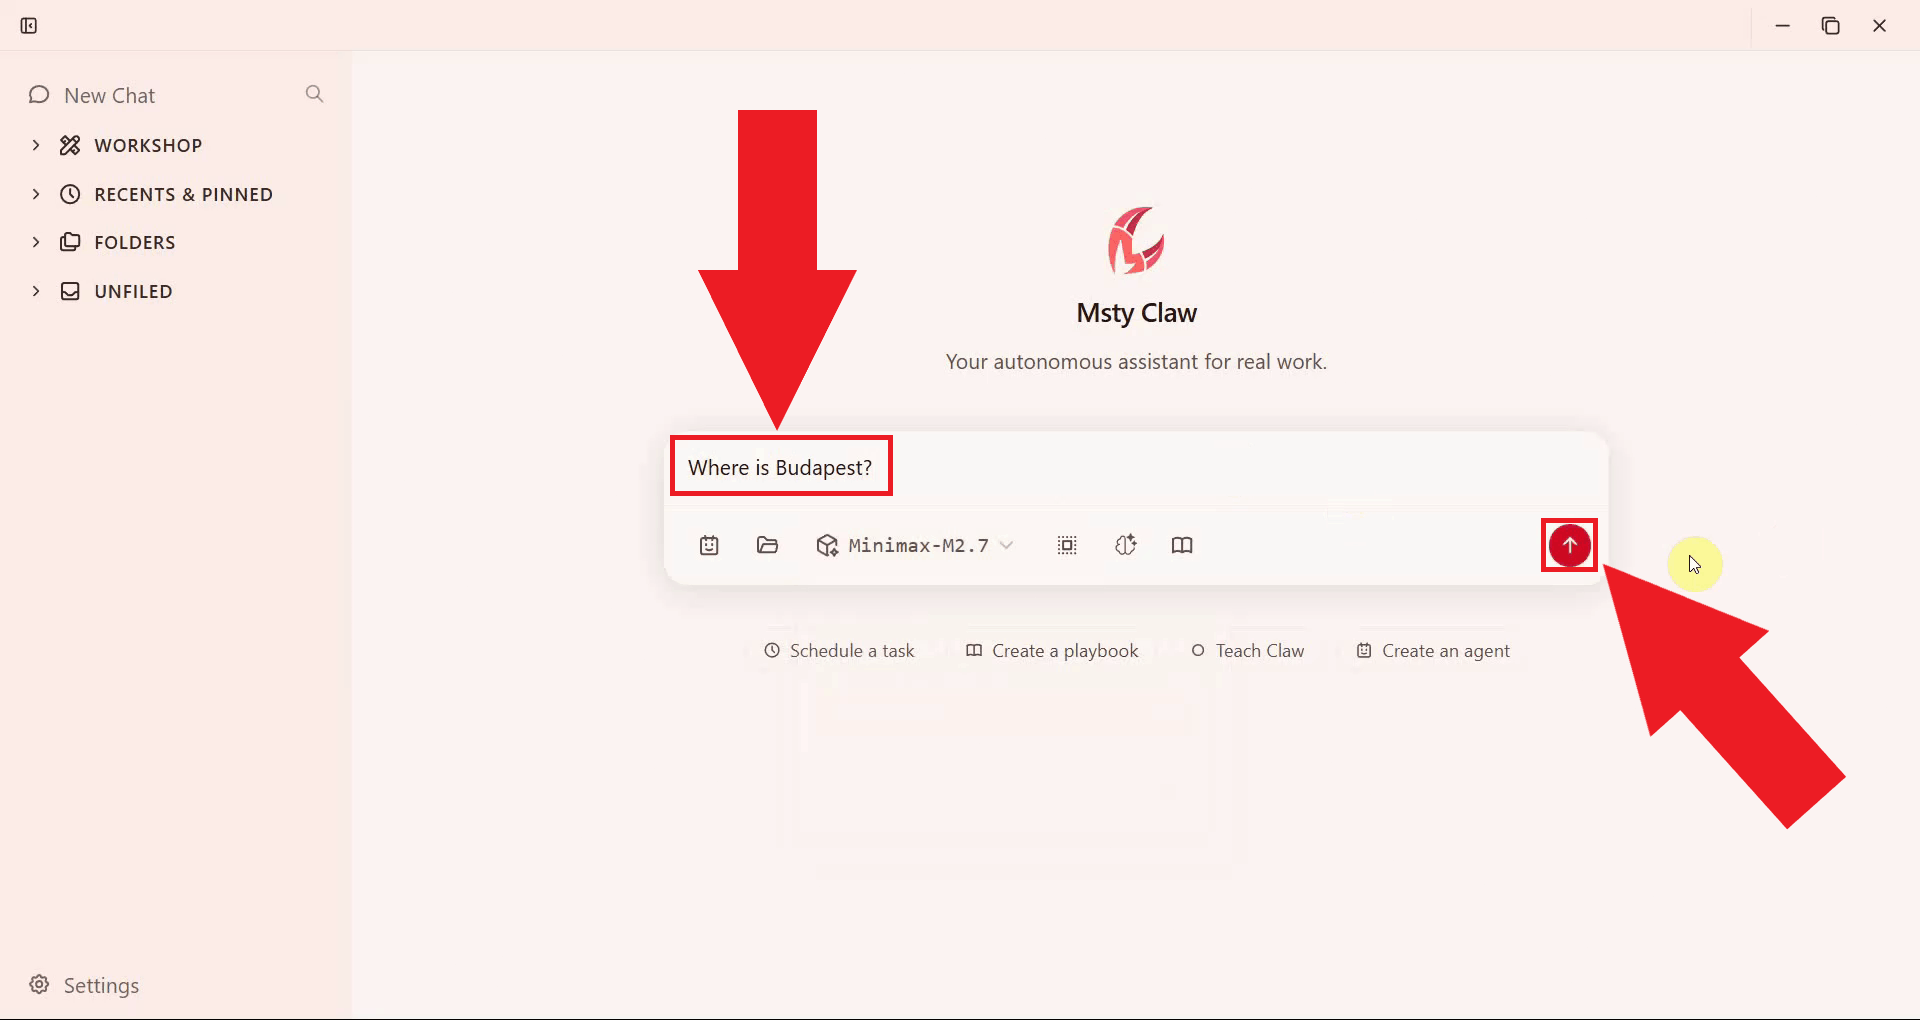
Type a test question in the chat input field and press Enter or click the send button to submit the prompt (Figure 13). Msty Claw will forward the request to Ozeki AI Gateway, which will route it to the selected model and return a response.
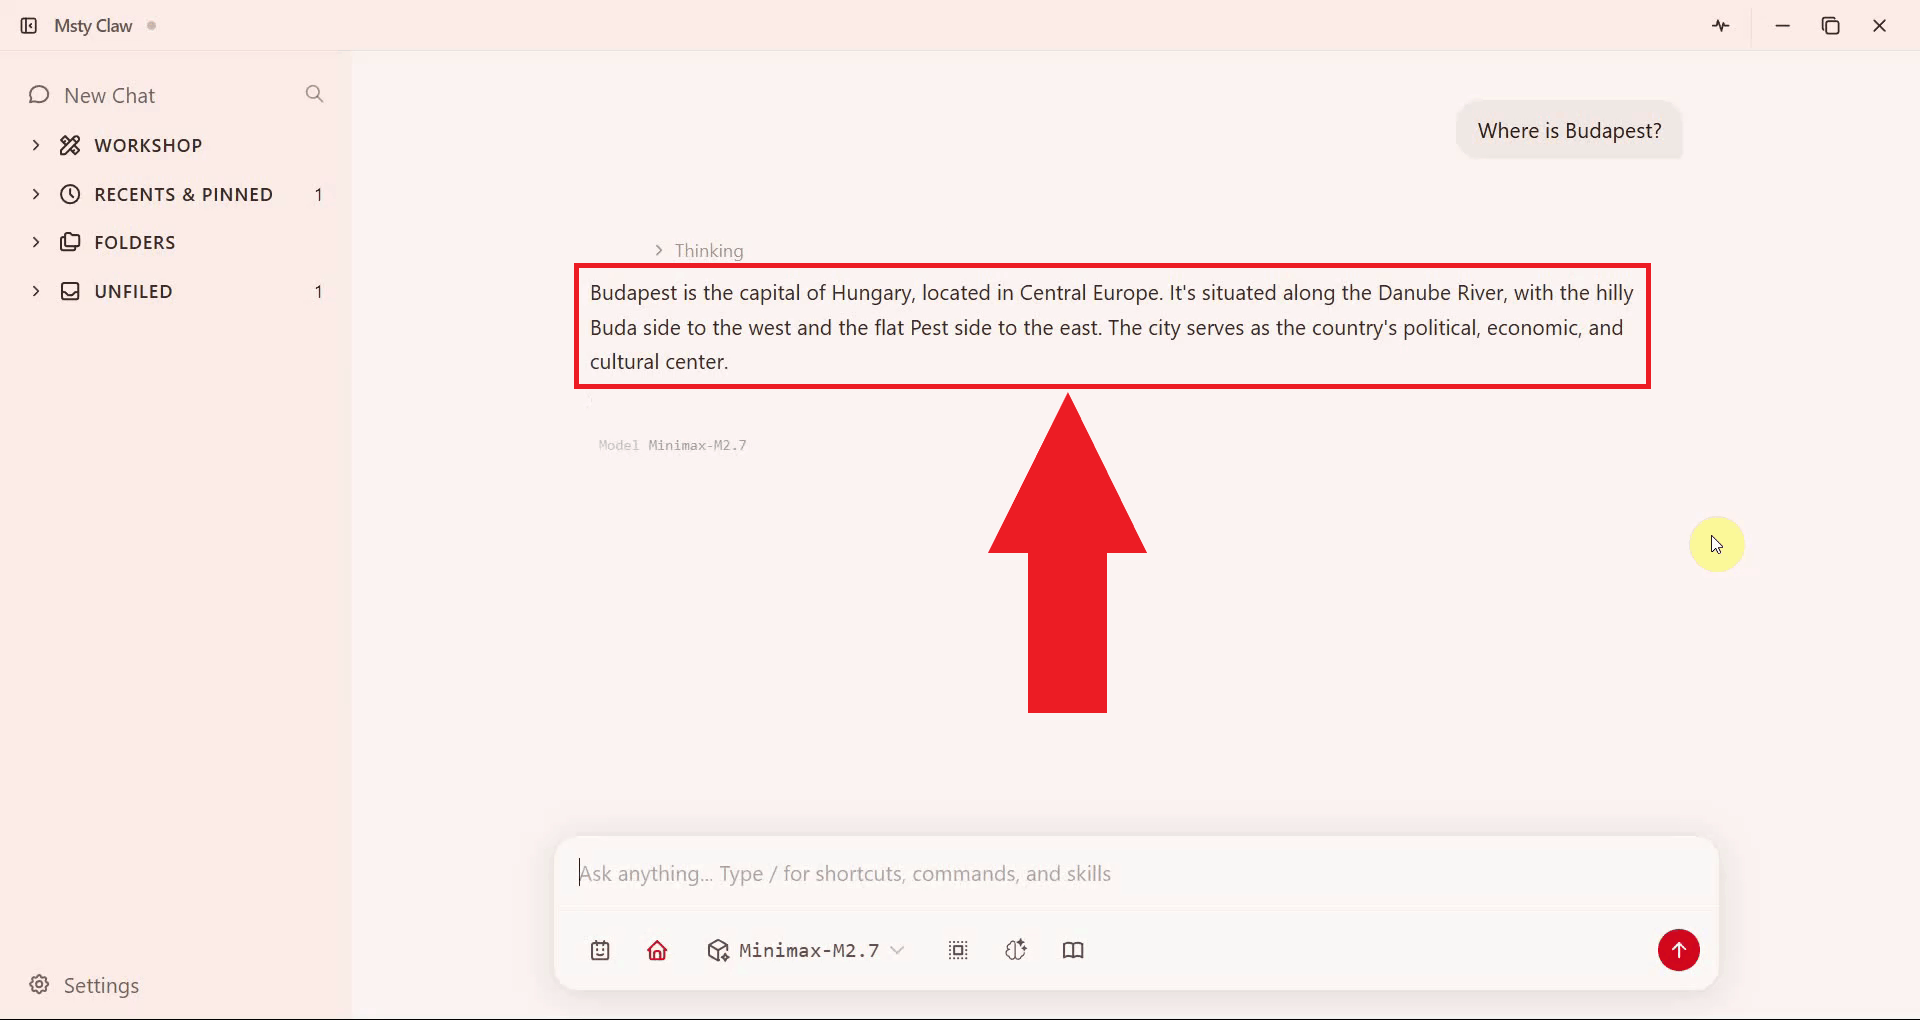
The AI response will appear in the chat window, confirming that Msty Claw is successfully connected to Ozeki AI Gateway and routing requests through your configured model (Figure 14).
To sum it up
You have successfully installed Msty Claw and configured it to use Ozeki AI Gateway as its model provider. All prompts sent from the Msty Claw chat interface are now routed through your gateway, giving you centralised control over API access, model selection, and usage monitoring. You can add further providers or switch models at any time from the Settings -> Model Providers menu.