How to install Ozeki AI Gateway on Mac using Homebrew
This comprehensive guide walks you through the complete process of installing Ozeki AI Gateway on macOS using Homebrew, the popular package manager for Mac systems. The installation involves setting up Homebrew if not already installed, using it to install the Ozeki AI Gateway package, and then configuring the Apache web server with PHP support to run the gateway's web interface. Throughout the tutorial, you'll learn how to modify critical Apache configuration files including httpd.conf and virtual host settings, establish proper URL rewriting rules for API endpoints, and set up the administrative interface for managing your AI Gateway. By following these step-by-step instructions with accompanying screenshots, Mac users can quickly deploy a fully functional AI Gateway capable of routing and managing AI API requests through a centralized dashboard.
Install Ozeki AI Gateway
/bin/bash -c "$(curl -fsSL https://raw.githubusercontent.com/Homebrew/install/HEAD/install.sh)"
To begin the installation process, you need to first install Homebrew, which is the package manager for macOS. Open the Terminal application on your Mac and execute the command /bin/bash -c "$(curl -fsSL https://raw.githubusercontent.com/Homebrew/install/HEAD/install.sh)". This script will download and install Homebrew on your system, which is essential for managing software packages including Ozeki AI Gateway.

brew install ozeki-systems/ozeki-ai-gateway/ozekiaigateway
Once Homebrew is successfully installed, you can proceed to install the Ozeki AI Gateway package. In your Terminal, run the command brew install ozeki-systems/ozeki-ai-gateway/ozekiaigateway which will fetch the package from the Ozeki repository. The installation process will display progress information as it downloads and installs all necessary dependencies and components for the AI Gateway.

After the installation command completes, you will see a confirmation message indicating that Ozeki AI Gateway has been successfully installed on your Mac. The terminal output will show that all files have been properly placed in their respective directories. This confirms that the core AI Gateway software is now ready for configuration on your system.

Configure httpd service
nano /usr/local/etc/httpd/httpd.conf
To configure the Apache web server for Ozeki AI Gateway, you need to edit the httpd configuration file. Use the command nano /usr/local/etc/httpd/httpd.conf to open the main Apache configuration file in the nano text editor. This file contains all the settings that control how the Apache web server operates on your Mac.

Listen 80
Within the httpd.conf file, locate the line that specifies which port Apache should listen on. Change or verify that the line reads Listen 80 to ensure Apache listens on the standard HTTP port. This allows the web server to accept incoming connections on port 80, which is necessary for accessing Ozeki AI Gateway through a web browser.

LoadModule php_module /usr/local/opt/php@8.1/lib/httpd/modules/libphp.so

<FilesMatch \.php$>
SetHandler application/x-httpd-php
</FilesMatch>
To enable PHP support in Apache, you need to add the PHP module configuration to the httpd.conf file. Add the lines LoadModule php_module /usr/local/opt/php@8.1/lib/httpd/modules/libphp.so and configure the FilesMatch directive with SetHandler application/x-httpd-php for .php files. This tells Apache how to process PHP scripts, which is essential for running the Ozeki AI Gateway web interface.

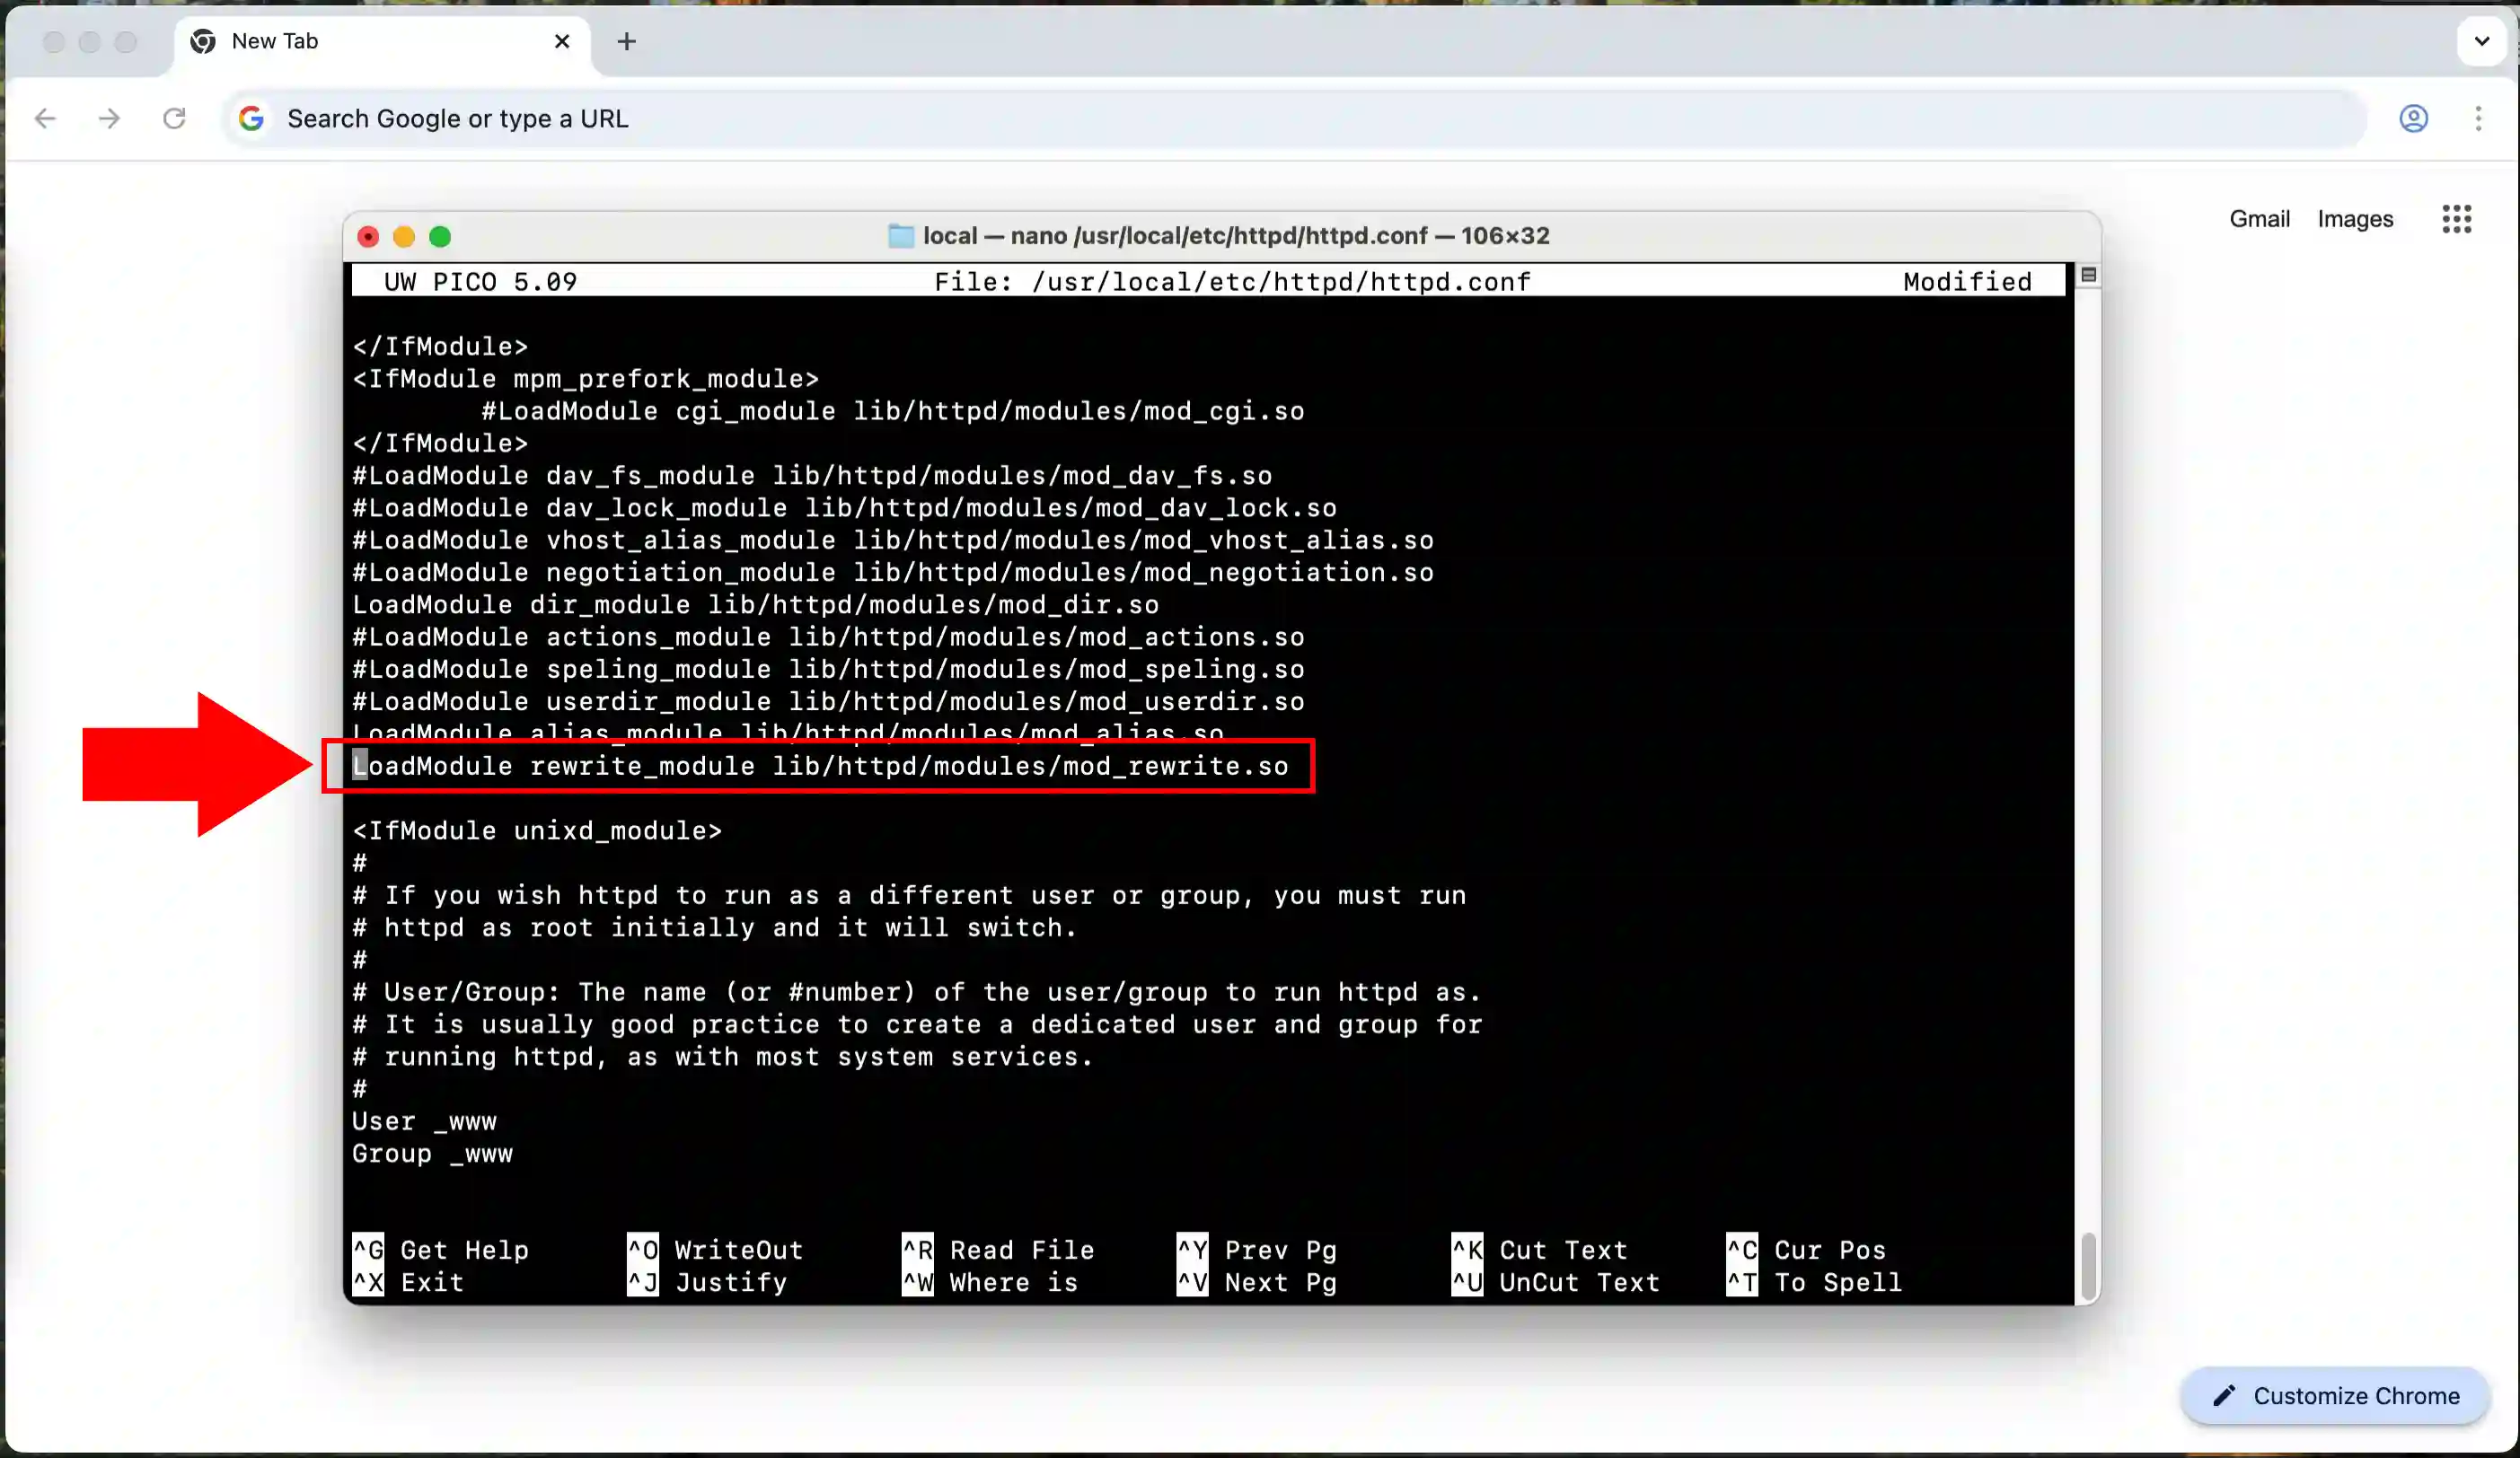
The Apache rewrite module must be enabled to allow URL rewriting functionality required by Ozeki AI Gateway. Locate the line containing LoadModule rewrite_module in the httpd.conf file and ensure it is uncommented (no # symbol at the beginning). This module is crucial for routing API requests properly within the gateway application.
Find the DirectoryIndex directive in the httpd.conf file and add index.php to the list of default files. The line should include both index.php and index.html so Apache knows to serve PHP files as the default homepage. This ensures that when you navigate to a directory, the index.php file will be automatically loaded if present.

At the end of the httpd.conf file, you need to add an Include directive to load the virtual host configuration. Add the line Include /usr/local/etc/httpd/extra/httpd-vhosts.conf to tell Apache to read additional configuration from the vhosts file. This separates the virtual host settings from the main configuration, making it easier to manage multiple sites.

nano /usr/local/etc/httpd/extra/httpd-vhosts.conf
Now you need to create the virtual host configuration for Ozeki AI Gateway. Run the command nano /usr/local/etc/httpd/extra/httpd-vhosts.conf to open the virtual hosts configuration file in the nano editor. This file will contain specific settings for how Apache should handle requests to your Ozeki AI Gateway installation.

<VirtualHost *:80>
ServerName localhost
DocumentRoot "/usr/local/var/www"

<Directory "/usr/local/var/www">
AllowOverride All
Require all granted
</Directory>

RewriteEngine On

RewriteRule ^/v1/?(.*)$ /ozeki/index.php?srv=aigate&api=gateway&path=/v1/$1 [L,QSA]

</VirtualHost>
In the vhosts configuration file, add a VirtualHost block with the ServerName set to localhost and DocumentRoot pointing to /usr/local/var/www. Include a Directory directive with AllowOverride All and Require all granted to allow access, and enable RewriteEngine On. Add the RewriteRule ^/v1/?(.*)$ /ozeki/index.php?srv=aigate&api=gateway&path=/v1/$1 [L,QSA] to properly route API requests to the gateway.

brew services restart httpd
After saving all configuration changes, you must restart the Apache web server for the changes to take effect. Use the appropriate command to restart the httpd service on your Mac. This will reload all the configuration files and apply the new settings, enabling PHP support and the virtual host configuration for Ozeki AI Gateway.

Open Ozeki AI Gateway user interface
http://localhost/ozeki/
With the web server properly configured and running, open your web browser and navigate to http://localhost/ozeki/ to access the Ozeki AI Gateway interface. This URL will load the main web interface for the gateway application. You should see the initial setup page where you can begin configuring your AI Gateway installation.

On the first access to Ozeki AI Gateway, you will be prompted to create an administrator account for managing the system. Enter your desired username, email address, and password to set up the admin credentials. This account will have full access to all features and settings of the AI Gateway, so choose a strong password for security.

After creating your admin account and logging in, locate and click on the AIgate service option in the main menu or dashboard. This will open the AI Gateway service management interface where you can configure API endpoints and settings. The AIgate service is the core component that handles AI API requests and routing.

Once you access the AI Gateway dashboard, you will see the main control panel with various sections including Logs, Setup, and About. The dashboard provides access to system logs for monitoring activity, initial configuration and setup options for customizing the gateway, and information about the Ozeki AI Gateway version and capabilities. From this central interface, you can manage all aspects of your AI Gateway installation and monitor its operation.
